- Home
- About Us
- SOULIVITY TODAY Radio Show!
- COMMUNITY HUB
- GO SHOP by Soulivity!
- ColumnsColumns
- CultureCulture
- Lifestyle
- Contact Us!
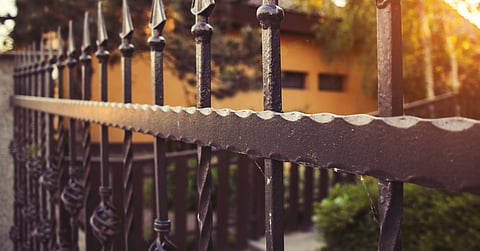
Old iron fences bring charm, security, and character to a home. When they’re allowed to go to seed, they may only inspire disgust and annoyance. Stop the entropy! Repainting an iron fence can be a great way to calm yourself while bringing beauty to your home’s exterior and preserving the integrity of the fence. Here’s a DIY guide to painting and restoring old iron fences to their former glory or even something better!
Before you begin, gather up the necessary supplies:
• Wire brush or sandpaper to remove rust and old paint.
• Rust converter to treat the remaining rust.
• A rust-inhibitive brand of primer is best.
• A high-quality enamel or oil-based paint designed for metal. Measuring your fence will help the person at the hardware or paint store calculate how many gallons you’ll need.
• Paintbrushes or spray paint, depending upon your preference.
• Gloves, safety glasses, and a mask.
Preparation is key to a successful restoration, and it will eliminate much of the stress that may come with the job. Begin by cleaning the fence to remove dirt and debris. Use a wire brush or sandpaper to eliminate rust and loose paint. Pay attention to small crevices because rust can hide in there. If the fence or gate is covered in rust, consider using a rust remover or a converter to treat it before proceeding.
If rust has already corroded large sections of the surface, replacement might be necessary. If not, applying a converter chemically changes rust into a stable compound, stopping further corrosion. Be cautious and follow the manufacturer’s instructions for application and drying times.
Once the rust converter dries, apply the primer. Rust-inhibitive products protect the metal and provide a solid base for the paint to adhere to. Apply the primer evenly in long strokes, thoroughly covering the entire surface of the fence or gate. Let the primer dry overnight, setting up the surface for the final steps.
Now for the fun and relaxing part! Choose a high-quality enamel or oil-based paint because it provides durability and a smooth finish to metal surfaces. Use the traditional paintbrush for a more meditative approach, but don’t ignore the convenience and thoroughness of spray paint for an even application. Apply the paint thinly and evenly, and allow each layer to dry before applying the next. As a rule of thumb, two to three coats are sufficient for a gorgeous and long-lasting finish. And speaking of finishes, you’re not limited to paint! You can apply many finishes for your iron fence and gate, such as powder coating.
Once the last coat is dry, inspect the fence and gate for any missed spots. Look for uneven coverage, and re-apply it for a smooth and solid look. The painting doesn’t necessarily stop there! Over time, check in and apply touch-ups to chips, scratches, and faded spots. This will hold off the need for another comprehensive paint job for a long time.
That’s our DIY guide to painting and restoring old iron fences. Enjoy the restful and satisfying experience only a new paint job can bring.
